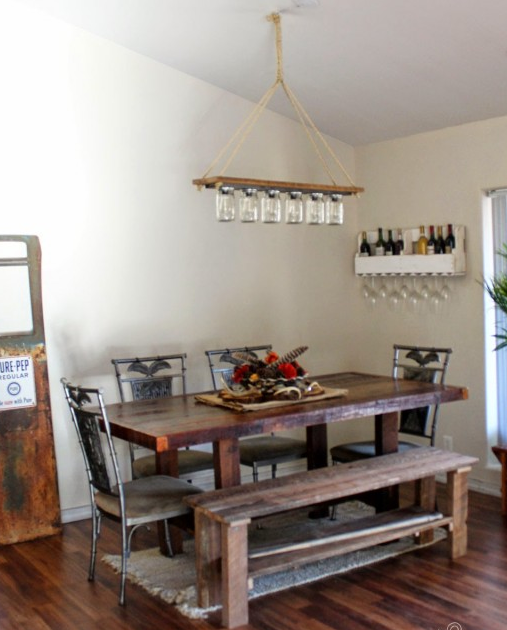
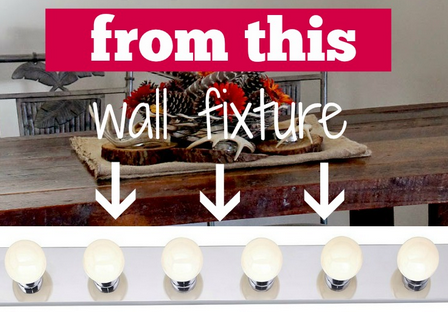
Light fixture are so expensive and tend to look, well like everyone else you know. But here’s an idea sure to turn heads and become unique to your home alone!
TheSummeryUmbrella
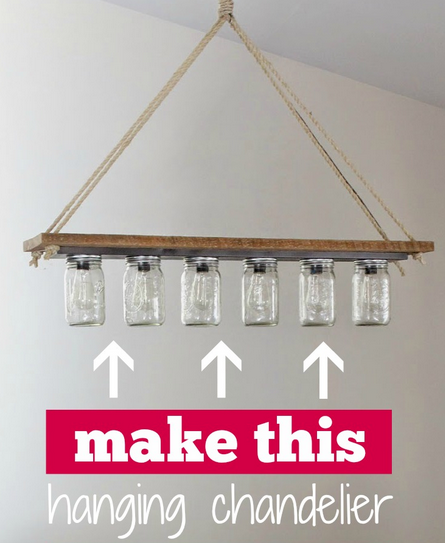
Turn your old light fixture into a creative hanging fixture sure to spark conversation.
Here’s what you’ll need:
- 40” L x 8.5” W x 1” thick piece of reclaimed barn wood
- Repurposed Bathroom Light Vanity Strip
- Spray Paint
- 6 Mason Jars
- 6 Edison Light Bulbs (or any bulb of your choice)
- Drill and Bits
- Screws
- Rope
TheSummeryUmbrella Featured On Remodelaholic
TheSummeryUmbrella Featured On Remodelaholic
Step 1: First, I painted the light fixture (remember to tape off the light sockets!). This item was repurposed from our guest bathroom so all it needed was a little paint. I used my all- time favorite color of spray paint: Rust-oleum Oil Rubbed Bronze.
TheSummeryUmbrella
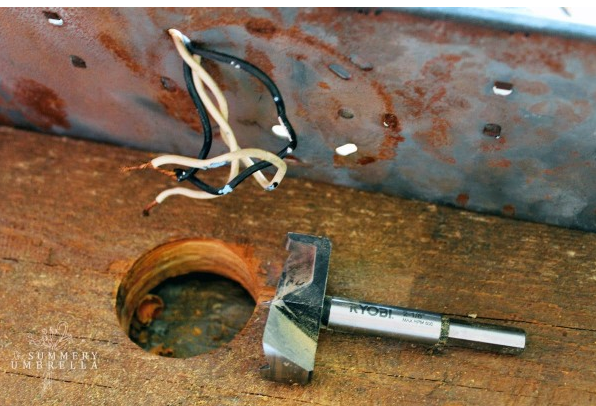
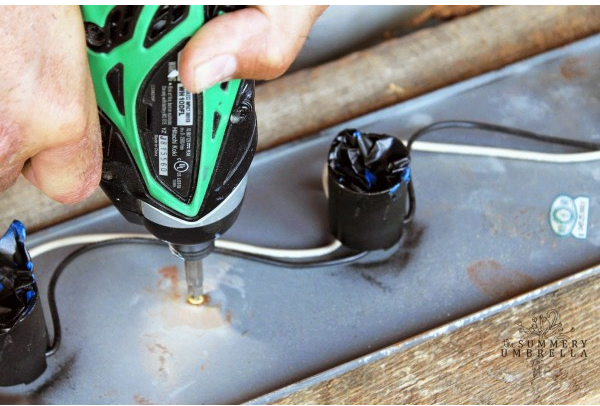
Step 2: Next, drill a hole into the barn wood with a 2 1/8 inch drill bit for the electrical wires.
TheSummeryUmbrella
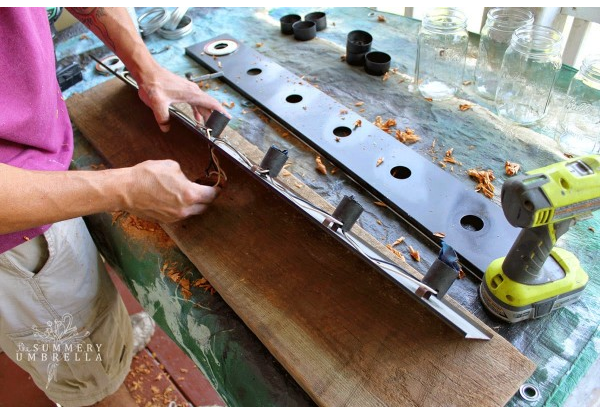
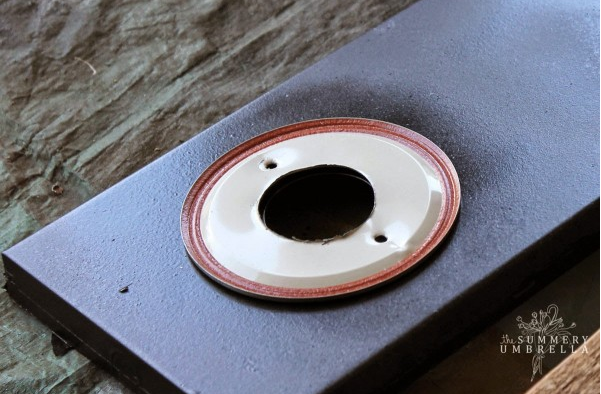
Step 3: Pull apart the light fixture so it can be attached to the barn wood. Drill four holes; one on each end and two in the middle to secure just the inside piece of your light strip to the piece of barn wood.
TheSummeryUmbrella
TheSummeryUmbrella
Step 4: Attach the exterior part of your light fixture (this particular one just clipped back into place).
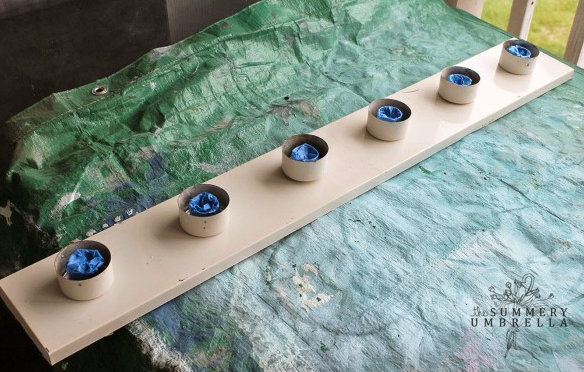
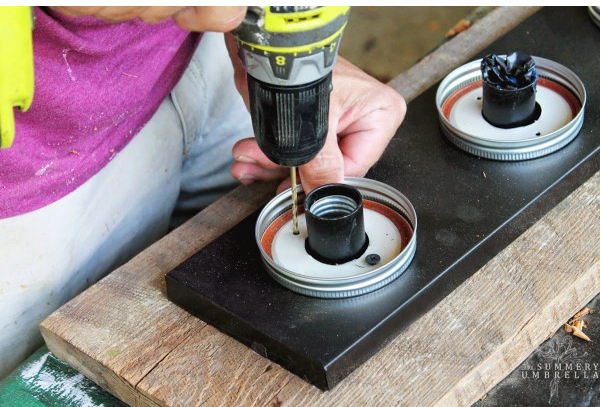
Step 5: Drill holes into the Mason jar lids using 1 3/8 inch drill bit for the light socket opening. Use a 1/8 inch drill bit to pre-drill two holes into each lid so they
also can be securely fastened to the fixture.
TheSummeryUmbrella
Step 6: Place the Mason jar bands on first, then the lids and finally screw them in. You can also screw in the light bulbs and Mason jars at this point if you want to get a preview of
your new light.
TheSummeryUmbrella
Step 7: Using a ¾ inch drill bit, drill four holes (two on each end) of the wood to allow access for the rope that will hang your light fixture.
TheSummeryUmbrella
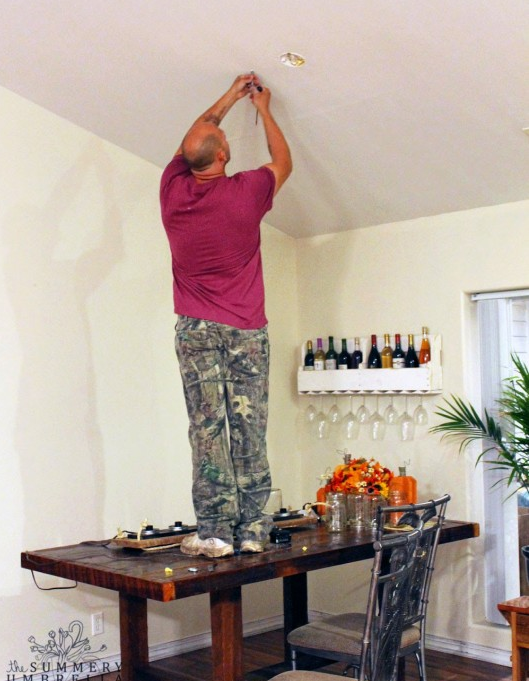
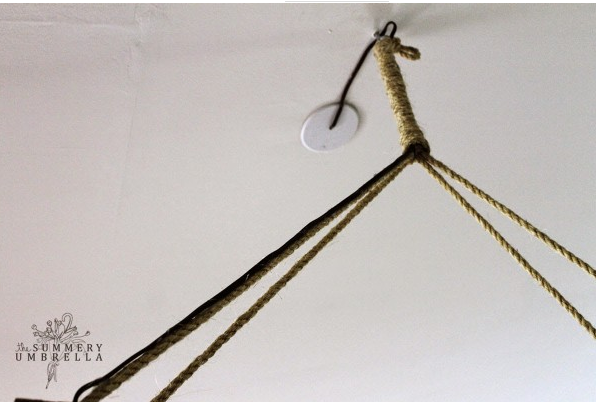
Step 9: Measure from the ceiling down to approximately how high above your table you would like your light fixture to hang. The length of the rope and height of the light fixture will depend on where you are hanging it and the height of your ceiling.
TheSummeryUmbrella
TheSummeryUmbrella
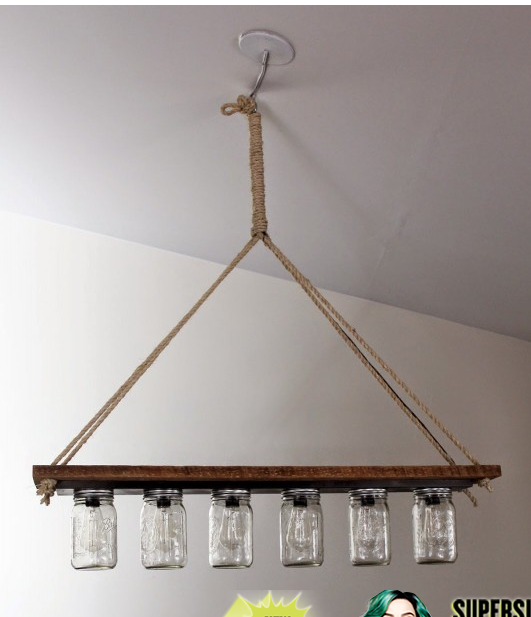
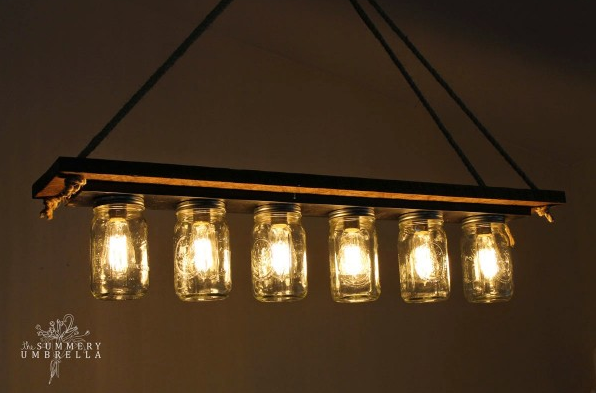
And…you’re done!
TheSummeryUmbrella